To see the Leave list, go to HRM -> Leave from the menu bar. You’ll be redirected to the Leave page, where all Leaves are displayed.
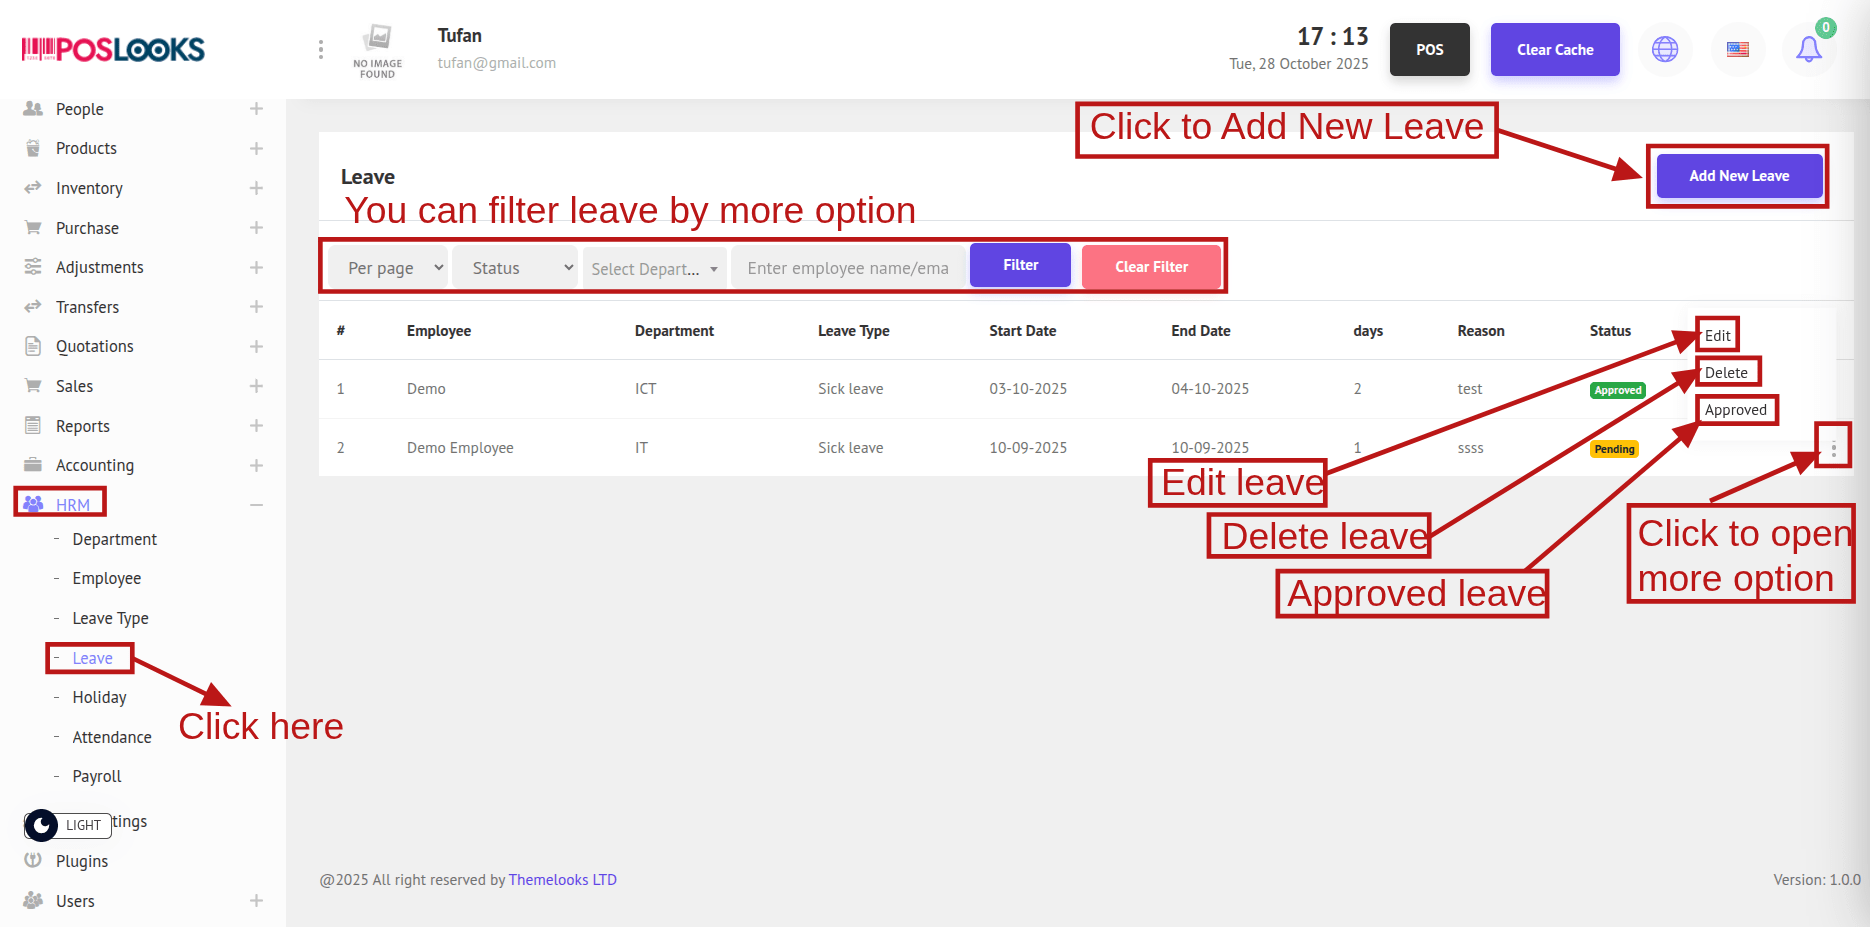
To create a new leave, click Add New Leave. A popup window will open—complete the required fields and click Save to create the leave.
Note: If Department, Employee, or Leave Type is not available, please create those first. After adding them, you can create the leave.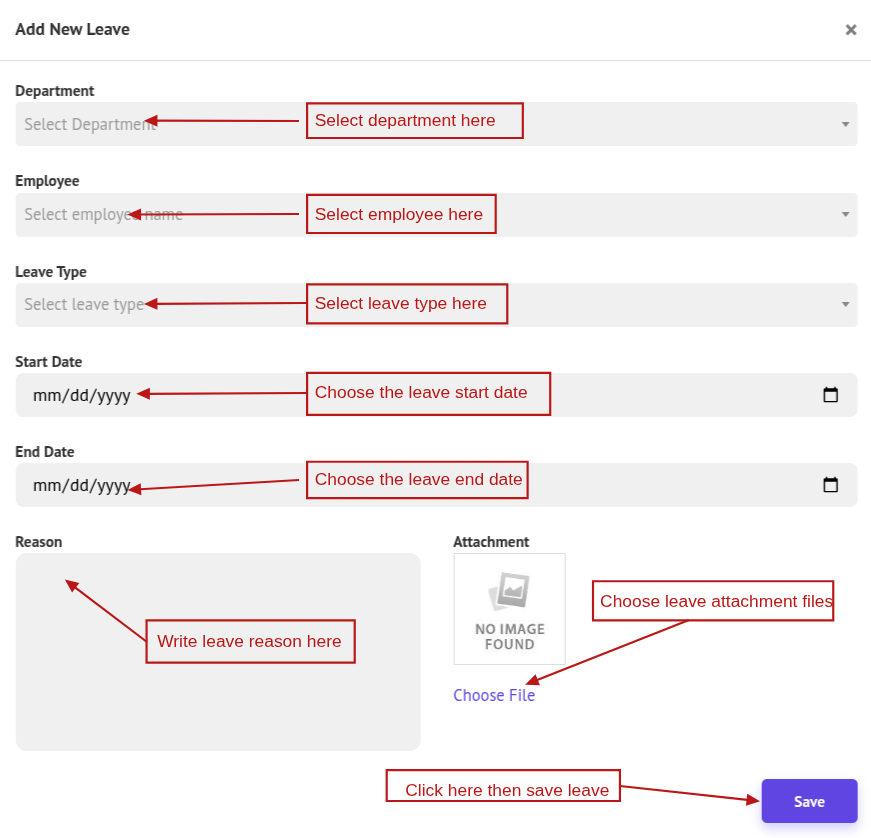
To update a leave, click Edit, make the necessary changes in the popup, and click Update to save.
To delete a leave, click Delete to remove it.
Note: Approved leaves cannot be deleted.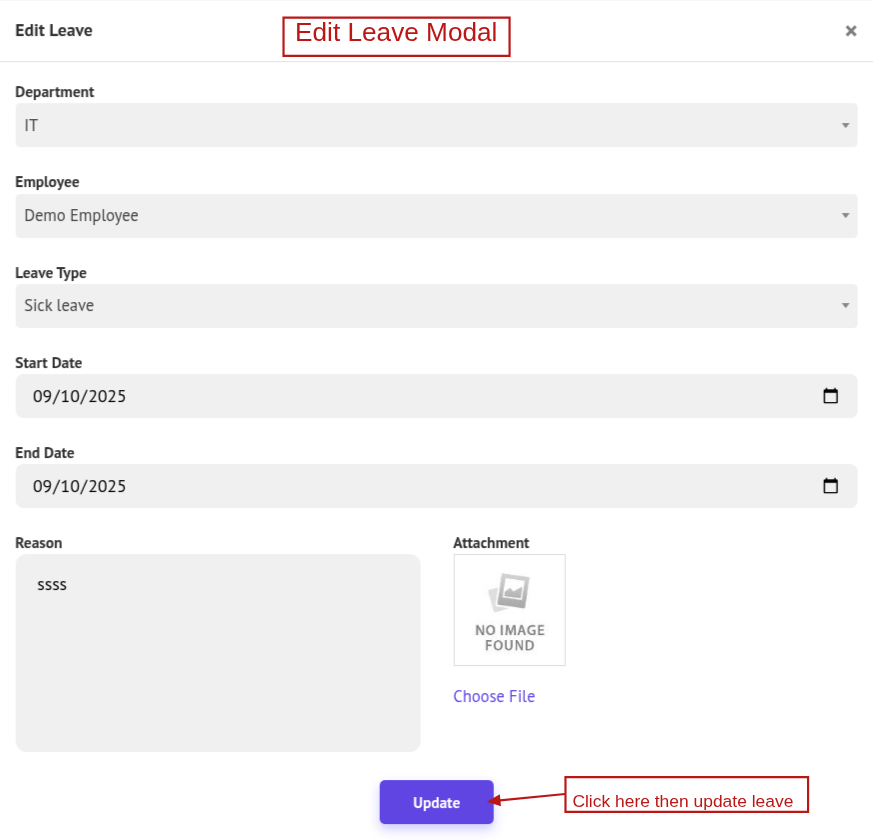
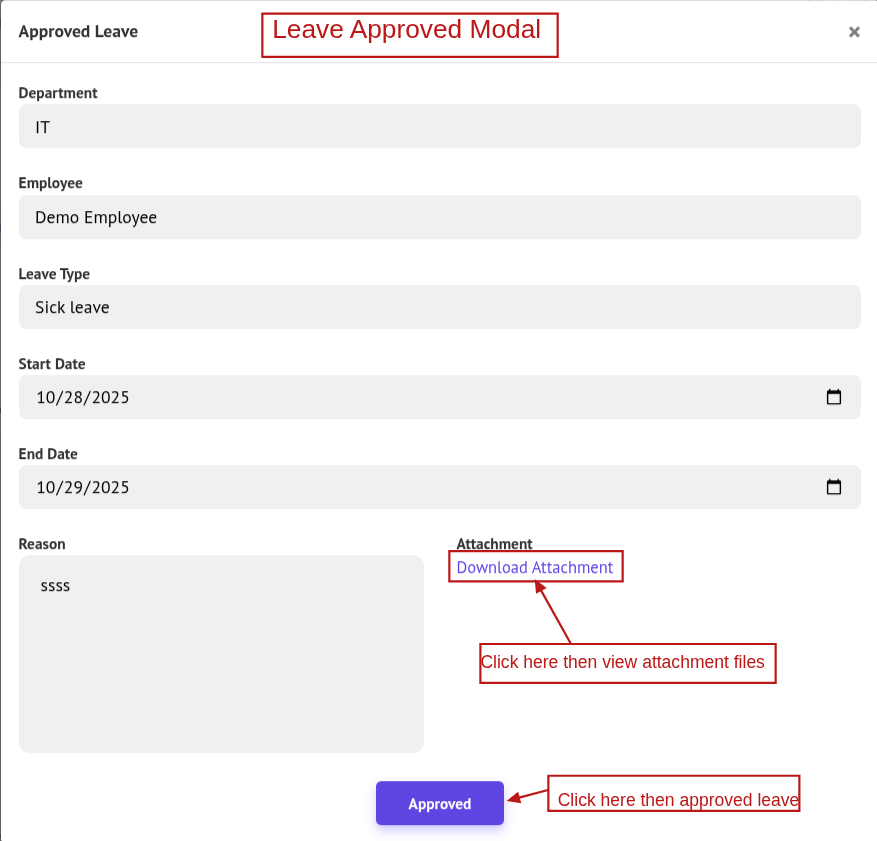
If the leave status is Pending, click Approve. An approval modal will open showing the leave details (request time and any uploaded documents). Click Download Attachment if you need to download files. To finalize, click Approve.
Note: If your workflow allows editing the requested dates, the Start Date and End Date fields will be editable in the approval modal. In that case, you may adjust the dates during approval.