
Go to Sales -> POS Manager in the sidebar, or click the POS button in the header. Either option opens the POS page.
To access the POS page, follow these steps:
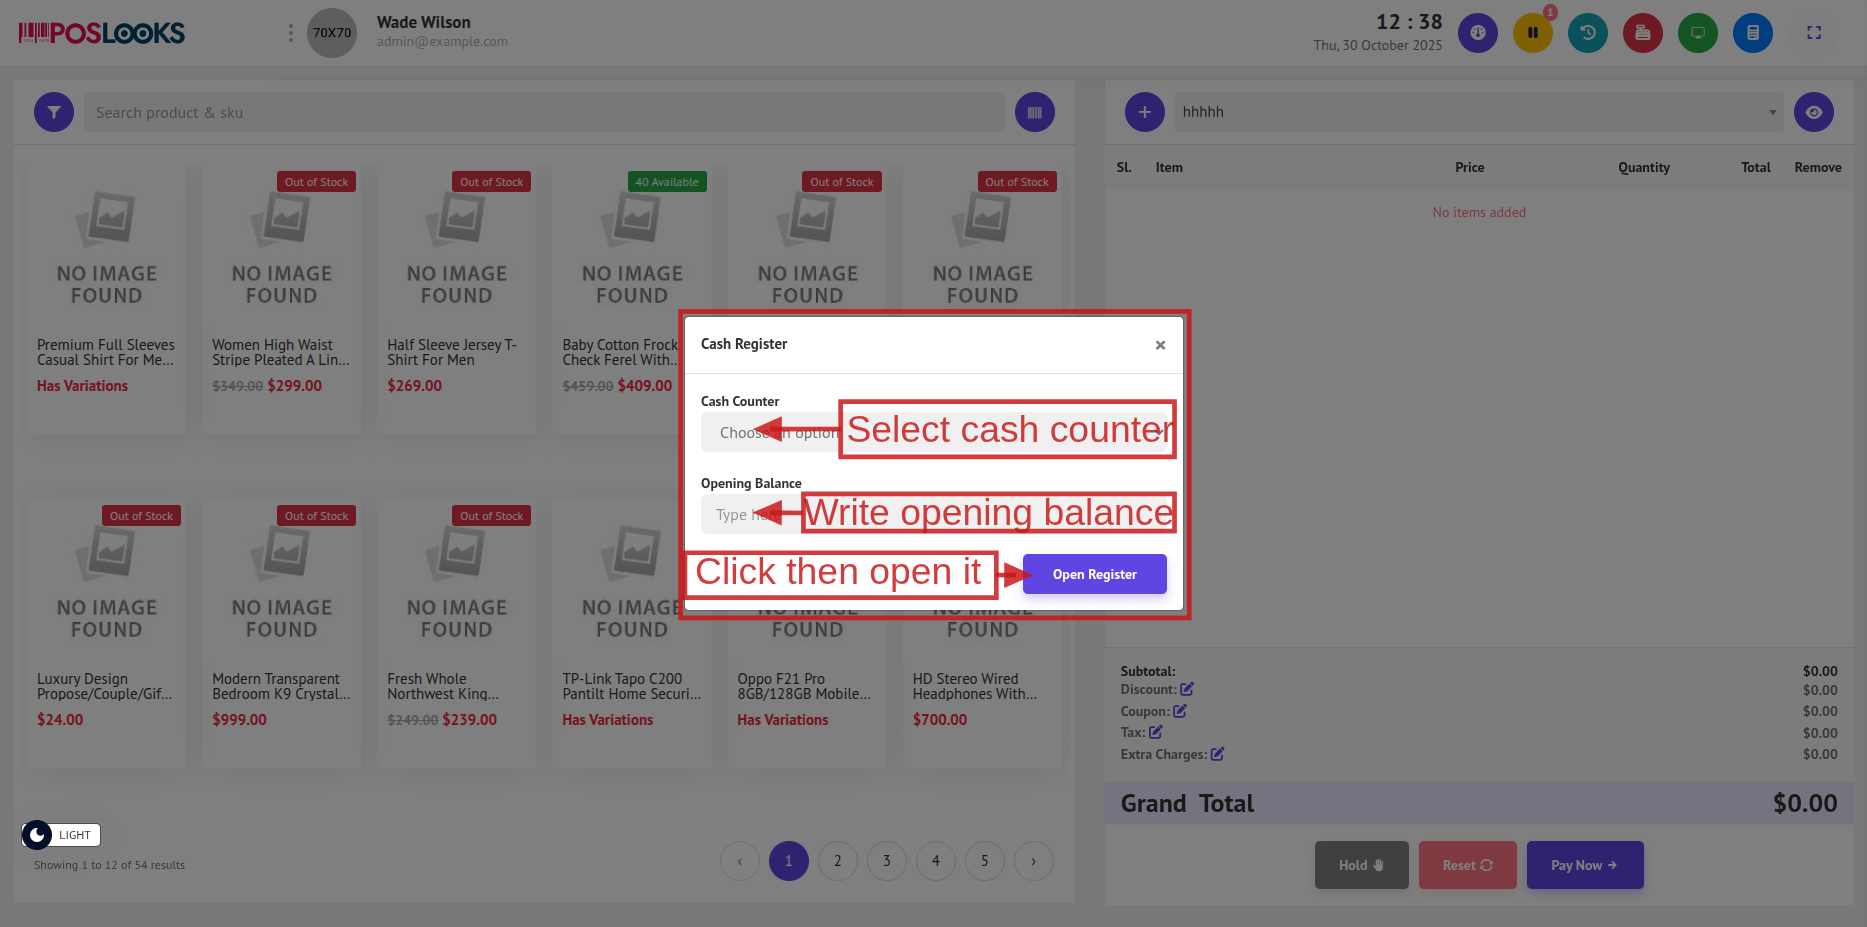
Select a Cash Counter: When the POS page opens, a pop-up will appear asking you to select a Cash Counter from the dropdown.
[Note: If no counters are available, go to POS Settings menu then click Cash Counter tab and create a new counter. Once added, return to the POS page and select it from the dropdown.]
Opening Balance: Enter the initial amount of cash in the register under Opening Balance.
[Note: If you close the pop-up without opening a register, you will be redirected back to the Dashboard automatically.]
Once the cash counter is selected and the opening balance is provided, click the Open Register button.
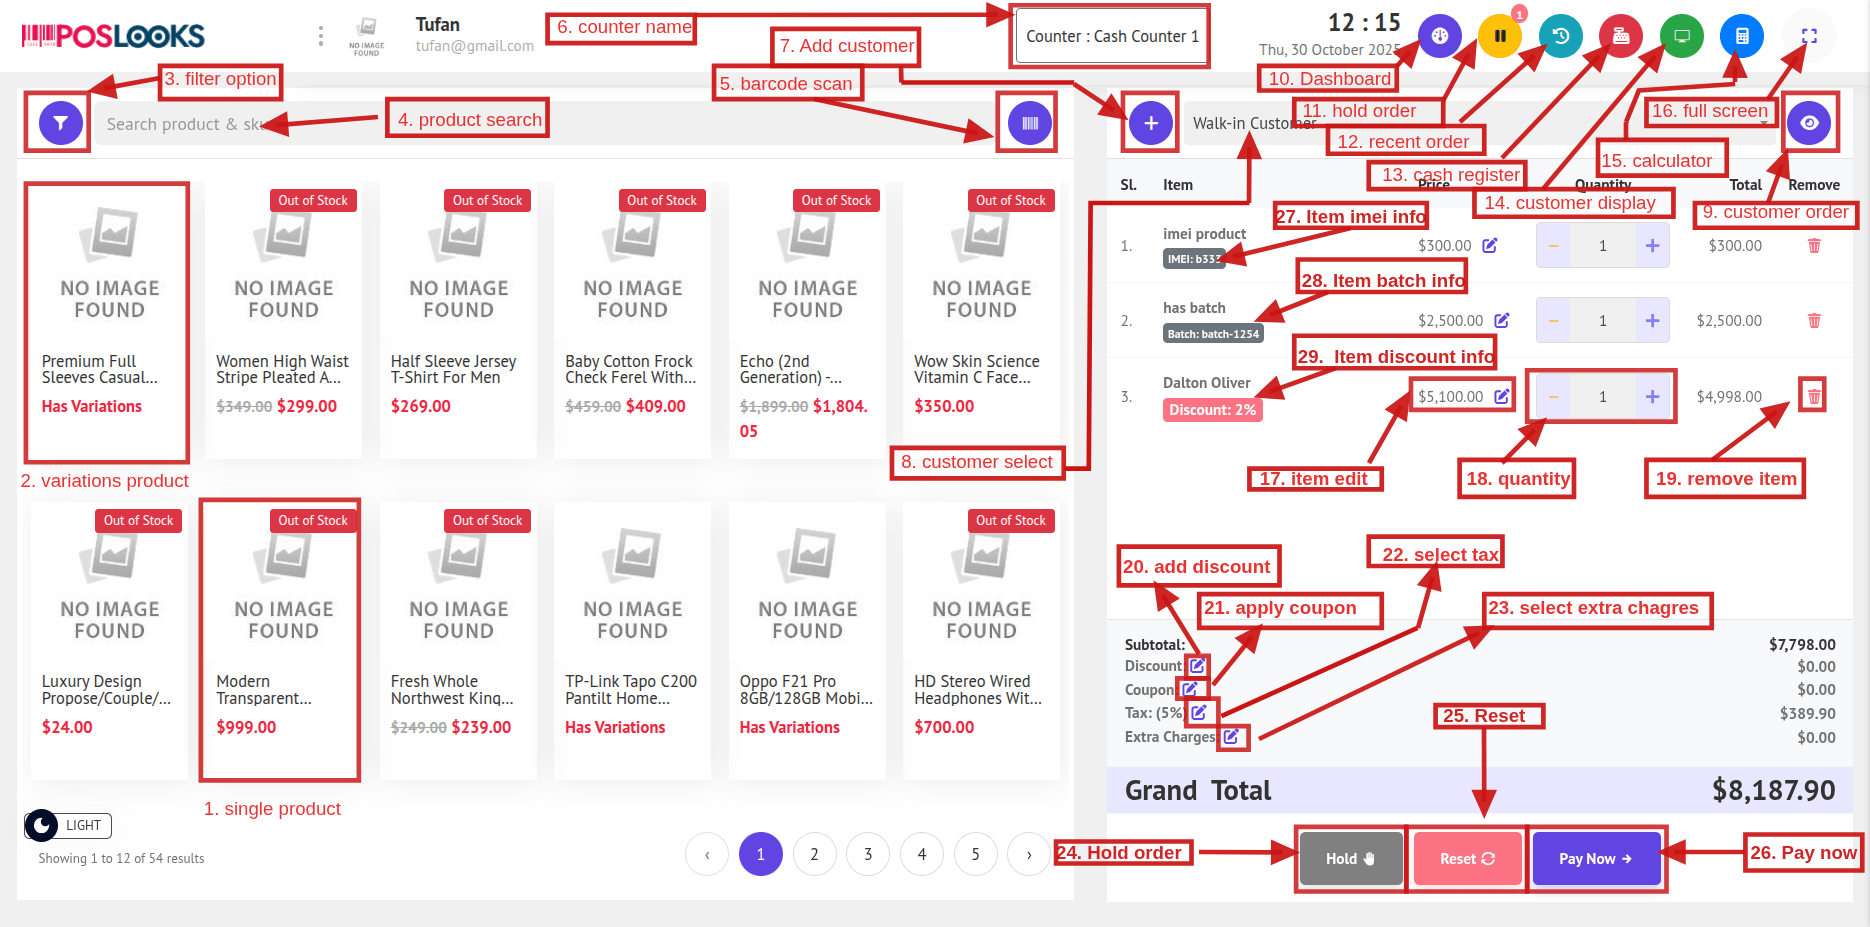
1. Single Product: Clicking on a single (non-variable) product will directly add it to the cart.
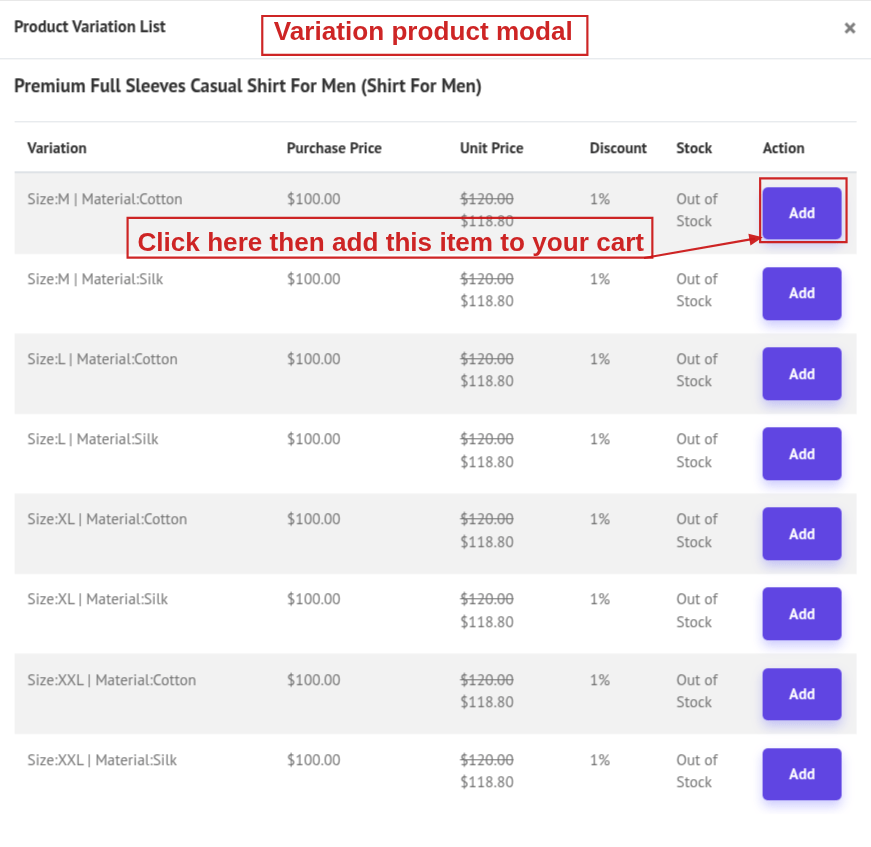
2. Variations Product:
Clicking on a product with variations (e.g., size, color) will open a pop-up. Select the variant and click Add to insert it into the cart.
3. Filter Option:
Click the filter icon beside the product search bar to open a filter pop-up.
From here, you can filter products in the following ways:
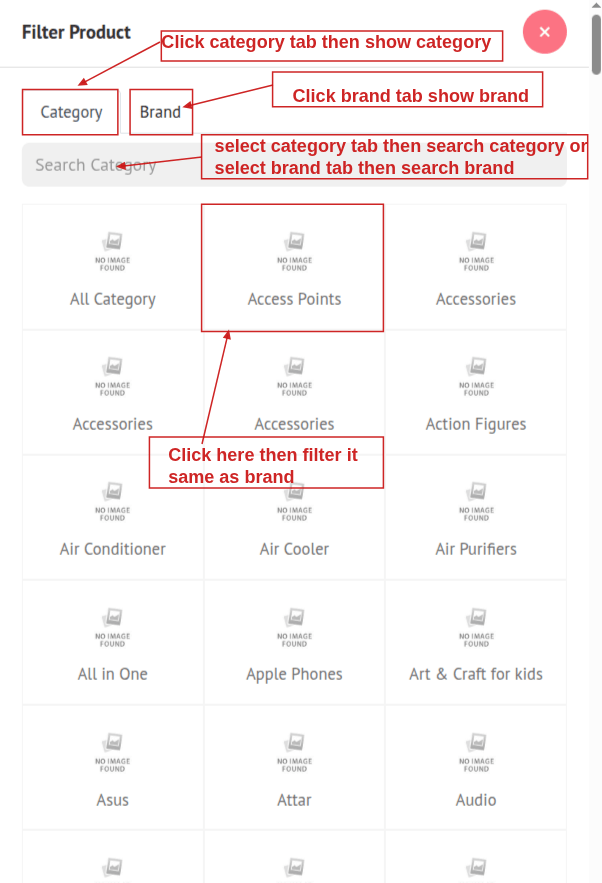
- By Category: Click the Category tab to view all available product categories. You can also search for a specific category using the search bar.
- By Brand: Click the Brand tab to see a list of brands. You can search by brand name to quickly narrow down the list.
4. Product Search: Use the search input to find products by name or SKU or barcode instantly.
5. Barcode Scan:
- Click the barcode icon to scan products.
- If the scanned product is single, it will be added to the cart directly.
- If it's a variation product, a variant selection pop-up will open (Same as Variation Product).
6. Counter name: After you select/open a cash register, its name is automatically shown beside the Counter label so you can see which counter is active.
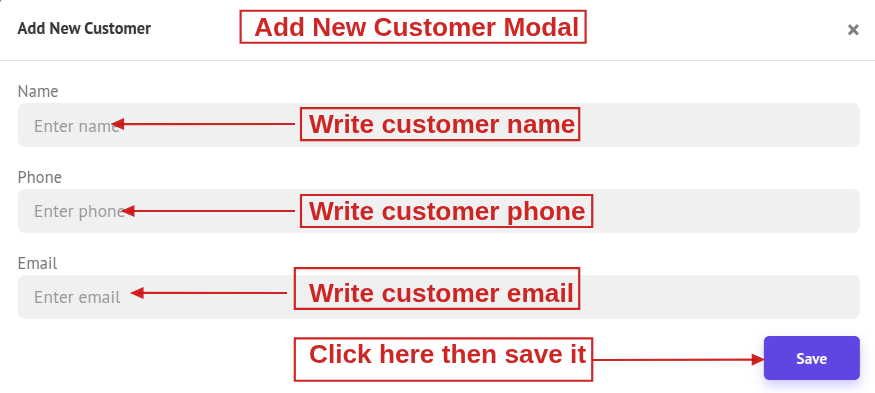
7. Add Customer: Clicking the Add Customer icon button opens a pop-up where you can enter:
- You can now create a customer by providing the necessary details. Enter the Name, Phone, and email.
8. Customer Select: You can search for and select an existing customer using name or phone number.
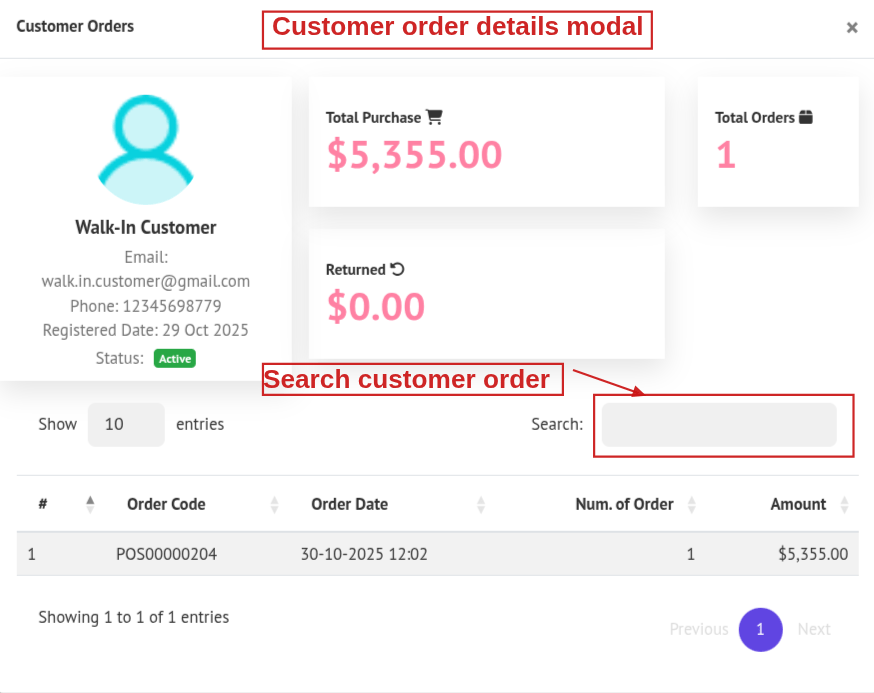
9. Customer Order: After selecting a customer, click the view icon beside their name to open a pop-up showing all orders made by that customer.
10. Dashboard: Clicking the Dashboard icon will redirect you to the main Home page of the admin panel.
11. Hold Order: Click the Hold Order icon in the header to open a popup showing the current list of hold orders.
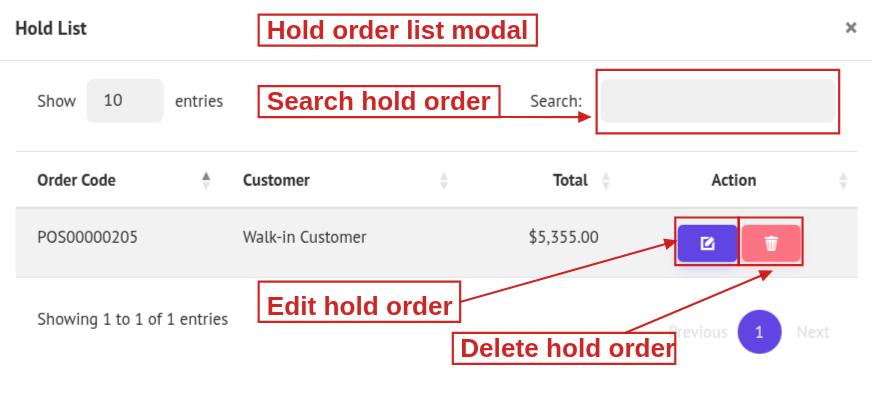
- Click the edit Icon beside an order to restore it to the cart.
- Click the Delete Icon, then delete this hold order
12. Recent Order: Click the Recent Order icon in the header to open a popup showing the current list of recent orders.
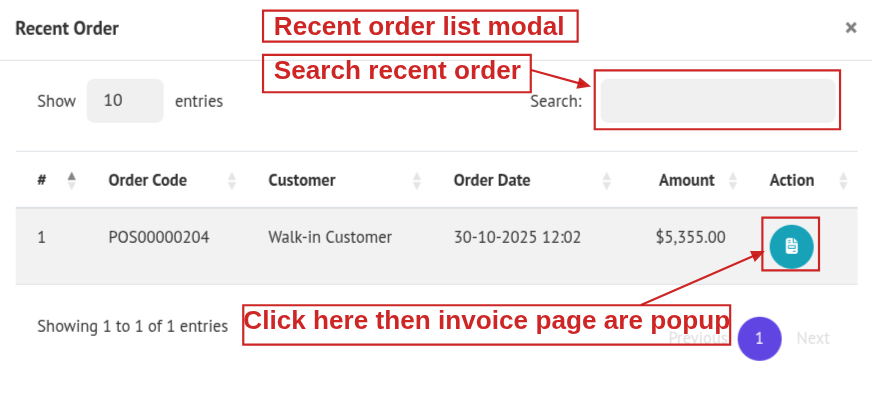
- Click the invoice icon to open that invoice in a new browser tab.
13. Cash Register: Click Cash Register Details icon in the header to open a popup with today’s sales summary.
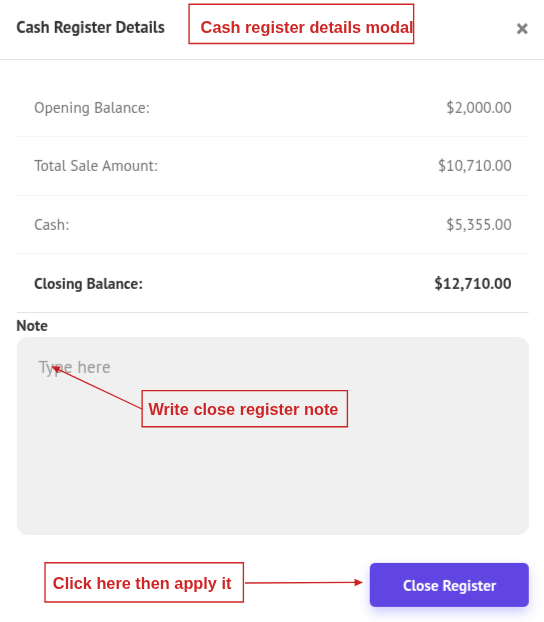
- After reviewing the cash register details, you can enter a note (optional), then click Close Register. The closing balance will be recorded and stored for the day.
14. Customer Display: Click the Customer Display icon in the header to open it in a new window.
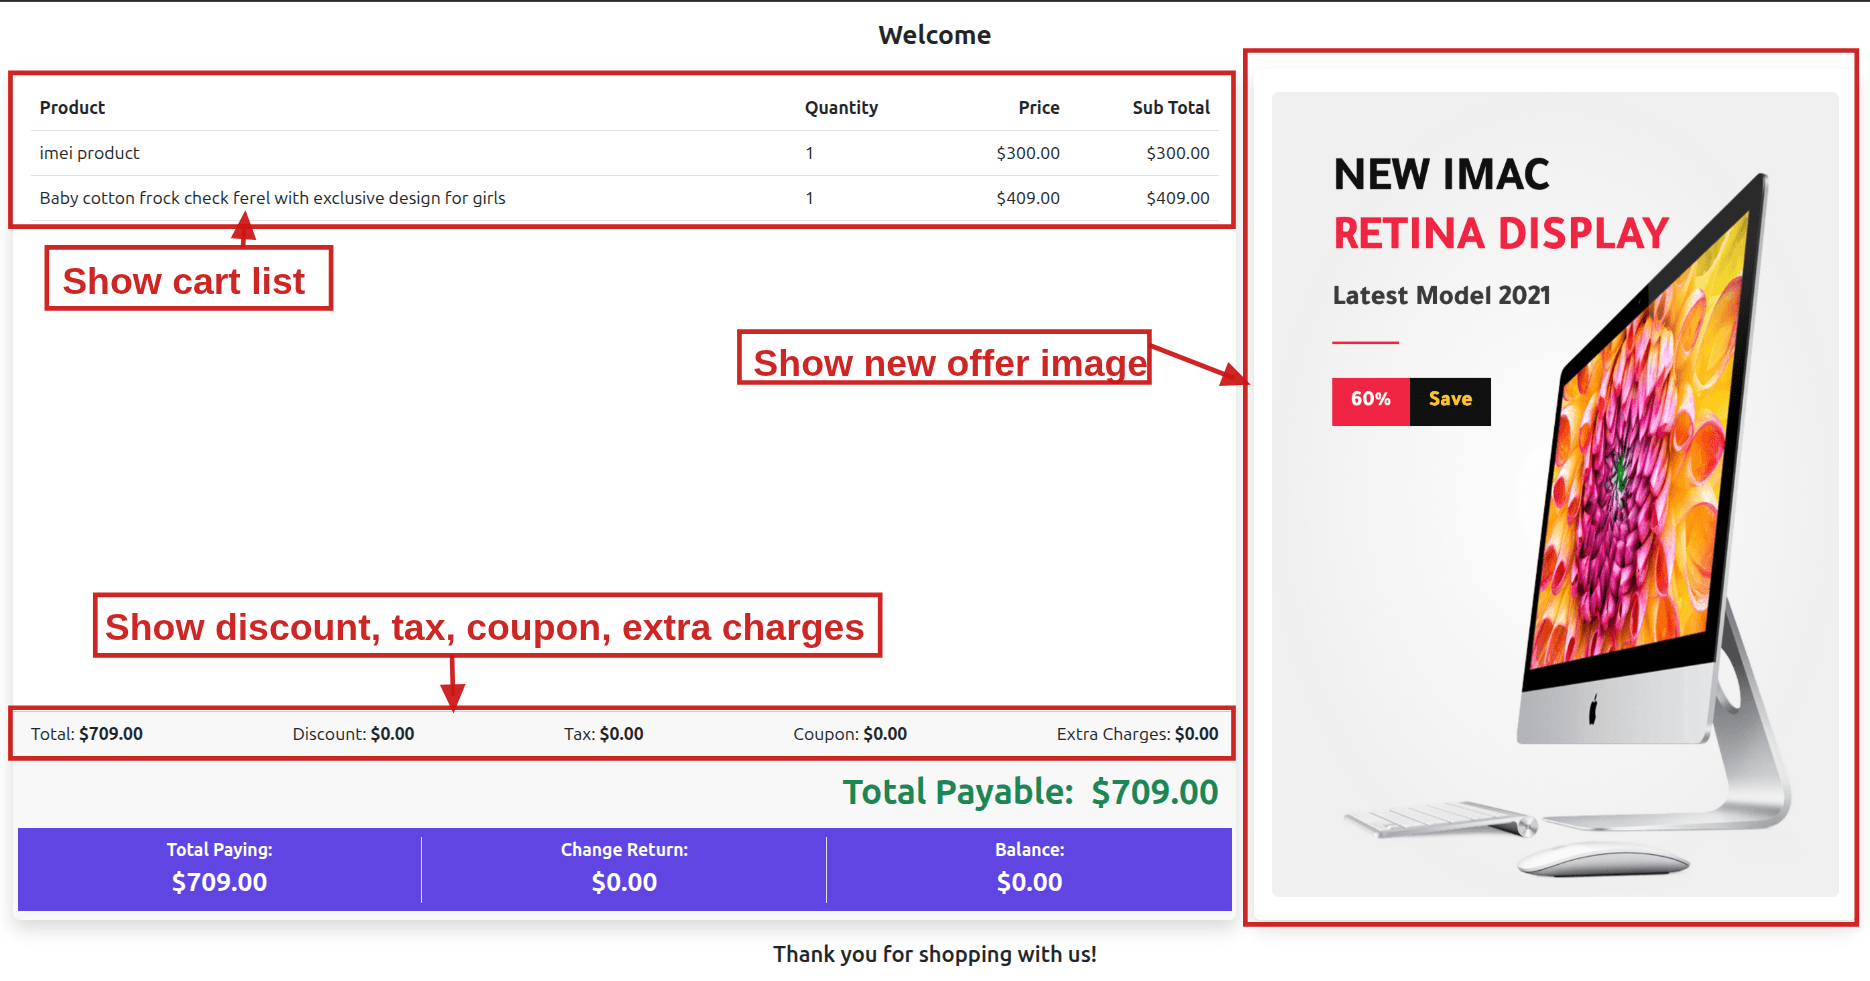
Customer Display includes:
- Cart Items: All items currently in the POS cart.
- Discounts: Total discount applied.
- Tax: Total tax added.
- Coupons: Applied coupon and amount.
- Extra Charges: Any additional fees.
- Total Payable: Final amount after all adjustments.
- Promotions (right side): New offers with promotional images.
- Changes Amount: Show Changes amount
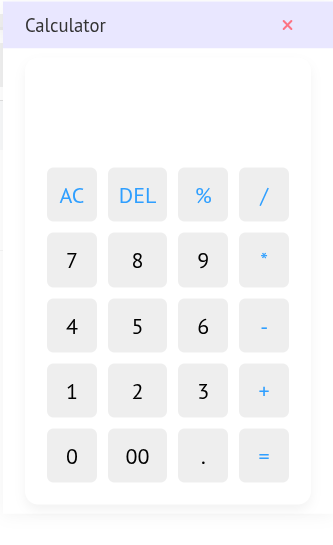
15. Calculator: Click the Calculator icon to open a built-in calculator pop-up.
16. Full Screen: Click the Full Screen icon to toggle the POS interface into full screen mode.
17. Item Edit: Click the Edit icon beside a cart item to open a pop-up where you can,
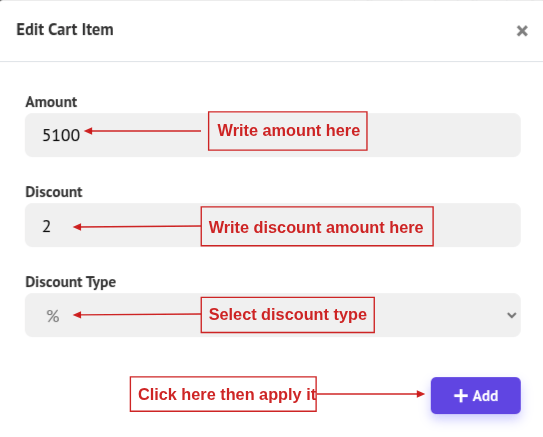
- Set the Changed Amount, Discount Amount, and Discount Type, then click Add. The updated information will be applied to the selected cart item
18. Quantity:
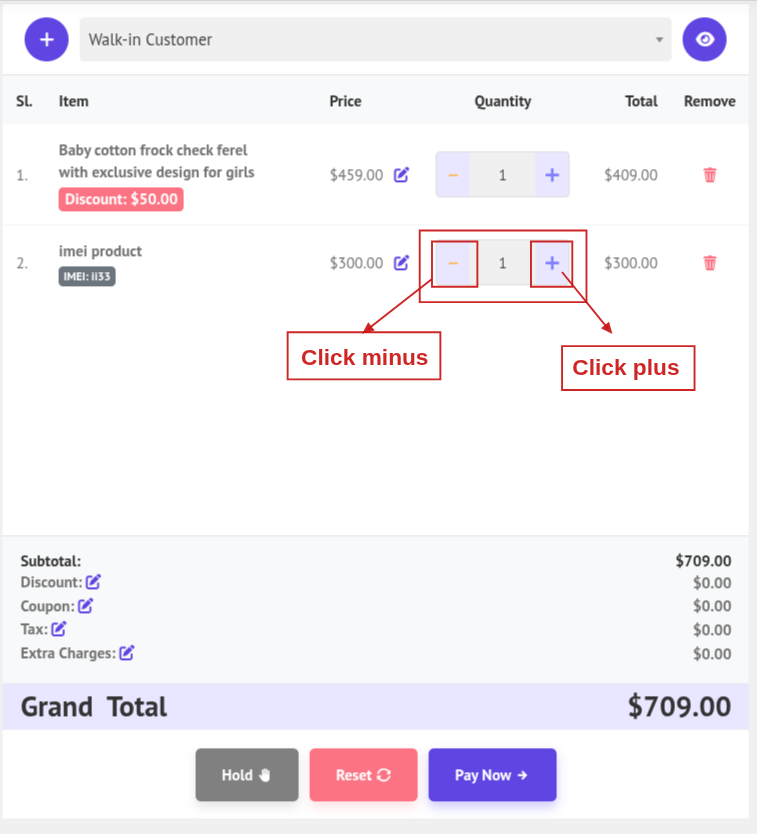
- Use the + and – icon next to a cart item to increase or decrease its quantity.
19. Remove Item: Click the Trash icon next to a cart item to remove it from the cart.
20. Add Discount: Click the Edit icon a pop-up will open on your screen.
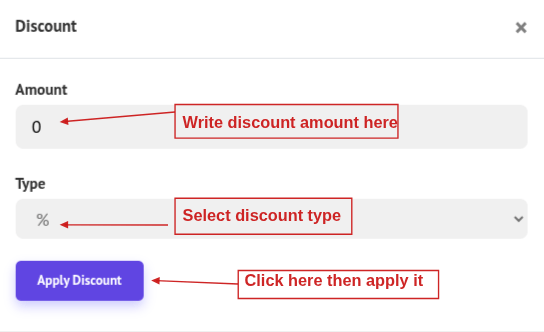
- Enter the discount amount, select the discount type (percentage or fixed), and click Apply Discount. The new discount will be applied.
21. Apply Coupon: Click the Edit icon. A popup will open on your screen.
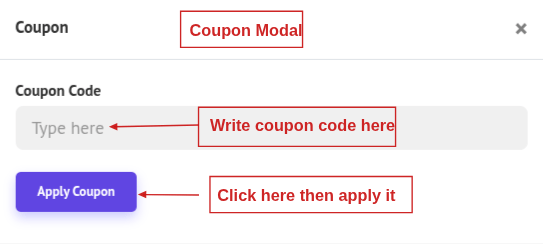
- In the popup, type the Coupon Code, Click Apply Coupon. If the coupon is valid and eligible, the discount is applied; otherwise, you’ll see that it "Coupon not found or expired".
22. Select Tax: Click the Edit icon a pop-up will open on your screen.
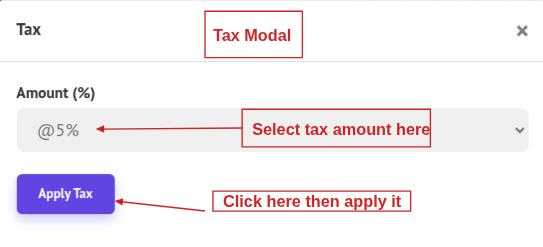
- Select the Tax and click Apply Tax. This will update the tax information and apply it.
[Note: When a Default Tax exists, it will auto-apply. To change it, open POS Settings from the menu bar, select the Tax tab, and set your Default Tax]
23. Select Extra Charges: Click the Edit icon beside Extra Charges. A pop-up will open on your screen.
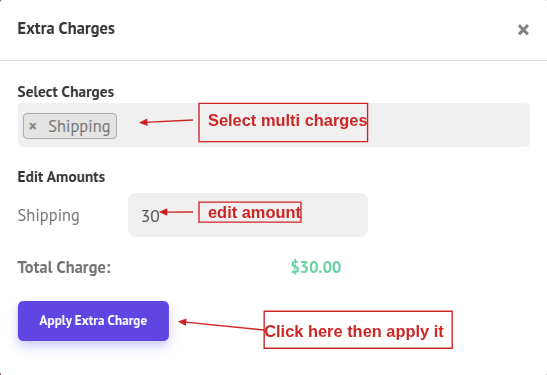
- Select one or more extra charges using the multi-select dropdown. Once selected, you can edit the amounts if needed. Then, click Apply Extra Charge to update and apply the information
24. Hold Order: Click Hold to save all current cart items as a held order that you can retrieve and resume later.
25. Reset: Click Reset to clear the entire cart and start fresh.
26. Pay Now: Click Pay Now to open the payment popup and complete the transaction.

Paying Amount: Automatically populated with the Total Amount Due.
Paid By: Choose a payment method (e.g., Cash, Bank, Card, etc.).
Payment Input:
-
You can enter the amount to pay manually.
-
If the entered amount exceeds the due amount, the Change field updates automatically with the amount to return.
-
If the payment is partial (less than the total), the Due field updates to show the Change Amount.
Quick Cash: The user can select predefined amounts using Quick Cash buttons for faster payment input.
Multi-Payment Option
-
You can split the payment across multiple methods.
-
Click Add More Payment (above the payment fields) to add another payment row.
-
For each row, set Paying Amount and Paid By (e.g., Cash, Bank).
-
After entering all payment details, click Submit.
Invoice: After submission, the invoice opens in a new browser tab for printing.